Plaster repair
When decorating, often repairing old plaster occurs. Minor cracks, pits and other damage occur due to shrinkage of walls or under mechanical stress. Such defects should be fixed, but how best to do it? Let's figure it out together.
First you need to remove the old plaster. This can be done with any sharp tool. Removal occurs up to the main layer, while part of the entire plaster must also be captured. If the layer of soil or spray sits quite firmly, then it can not be subjected to repair work. In this case, it is necessary to process only the finishing layer.
How it's done? First of all, remove the damaged old material and clean the surface. Then a primer layer is applied and it is necessary to capture the edges of the intact plaster. When the soil dries (and this is a few hours), you can begin to apply the finishing layer. By the way, if the main layer of plaster is damaged, then it must also be removed.
Quality control and repair of plaster
How to check the quality of old plaster? It is very simple, simple tapping with knuckles will help to identify defects. Have you heard a muffled sound? Know, the stucco is behind and needs to be removed.
How is the repair going? The process of updating the material is no different from the process of plastering and is carried out in the same way. At the same time, the joints between the new and old plaster must be carefully smoothed. Otherwise, you can get hollows, dents and other defects. And in order for the work to be of better quality, it is necessary to spray the work surface from time to time with water. An important point - the plaster solution must be taken the same as that used for surface finishing. And to get a flat and smooth surface it is necessary to "comb" with a wet brush.
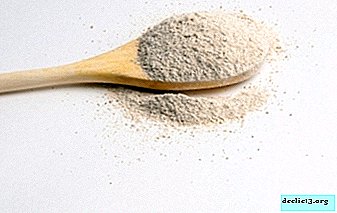
For a quality repair, the treated surface should be cleaned of old glue, paint or rubbed and grind the plaster. To do this, we need a solution of lime dough and sand. Sand, in turn, must be sieved through a sieve (hole diameter 1 per 1 mm.) And mixed with lime in a ratio of 1 to 1. Next, the solution is poured with water until it becomes a “creamy porridge”. The working surface must be abundantly sprayed with water, and then walk on it with a brush. Further, until the water has dried, apply the resulting solution in a thin layer. Using a grater, in a circular motion, the surface is rubbed. In this case, the grater can be covered with felt or felt, in which case the quality of work will be noticeably better.
How to overwrite cracks? This is not difficult: first we take a spatula and cut them to a depth of about 3-5 mm, while abundantly wetting with water. Then, with the same spatula, we fill the cracks with the solution and level it. In this case, the tool must be held perpendicular to the direction of the cracks. A few minutes after application, you can begin to "grease" the places with a grater. After complete drying, the work surface should be sanded with sandpaper or pumice.
What to do with cracks between the baseboard and the wall? They must be cleaned, moistened with water and poured with a solution. The remains of the solution must be cut off, after which new places are cleaned with a grater. At the end, the surface must be primed, otherwise stains may appear after staining.
Why is plaster cracking, flaking, or swelling?
Well, first, let’s make it clear that the first layer of plaster almost always cracks. This is due to the fact that water evaporates and, accordingly, the volume of solution decreases. To eliminate this problem, the wall must be rubbed with a grater. How to do it read above. What other reasons could there be?
- the most common reason is an incorrect concentration of the solution or it is not well mixed; usually too fatty solution can lead to the formation of cracks;
- poorly prepared work surface;
- applied too thick coat of plaster;
- applied too thin a layer and did not wet the surface;
- tried to speed up the drying process (heaters, drafts, etc.).
Exfoliation also occurs for several reasons:
- a new solution was applied to a dry layer of the old one or simply to a dry surface;
- stronger ones were applied to the weak first solution. For example, cement mortar was applied to lime;
- if lime-gypsum or lime mortar is applied to cement plaster or concrete base, the transition layer was not maintained. In order to avoid this, it is necessary to spray on the surface with cement, and then with lime-cement mortar. After you can plaster with lime mortar.
By the way, sometimes dutics appear on the surface, which easily crumble and leave behind a yellowish or white spot. This is due to improper preparation of the solution, and more specifically, the lime was not sufficiently seasoned and small particles were not extinguished in it. Once in the solution, they begin to increase in volume and form swellings. In order to avoid this, the uncured lime must be passed through a 0.5 to 0.5 mm sieve. By the way, decorative plaster looks very good in the Cossacks of the finishing finishing material. Read more here.
Watch the video: Restoring Original Plaster - how to repair lath and broken plaster (December 2024).


-
Features of the content of epiphyllum at home. Rules of care and photo plants
Epiphyllum - a completely unpretentious and beautiful flower, refers to leafy forest cacti. It is especially beautiful during flowering and is one of the most popular indoor plants and is a wonderful and durable decoration for any interior, garden or veranda. Despite its simplicity, there are still some conditions for caring for a beautiful plant, and they will be discussed in this article. ... -

-

-