Everything about transplanting echeveria at home and the subsequent care of the flower
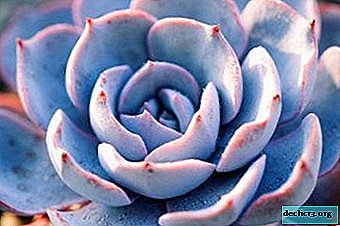
Echeveria is an unpretentious ornamental plant, and flower growers willingly grow it both on window sills and in their gardens. Its cultivation is not a hassle, and the eheveria itself does not require special attention, while delighting everyone with its aesthetic appearance.
Today we will look at how and why it is necessary to transplant this amazing flower, what kind of soil and pot it needs. You can also watch a useful video on this topic.
Why transplant a flower?
Firstly Echeveria transplant is necessary immediately after its purchase in a specialized store. Because the soil in which it was located is absolutely not intended for its long stay in it.
Attention: Already in the process of growing echeveria, it is necessary to transplant it if there is very little space left in the pot for the plant to make it comfortable.How often do you need to do this?
 Florists recommend replanting young plants once a yearbecause in a year it reaches the size when the pot in which it is located becomes small.
And it is advisable to do this at the very beginning of spring in order to provide echeveria with fresh nutrients for a hot and arid summer, when it, like all plants, will actively grow.
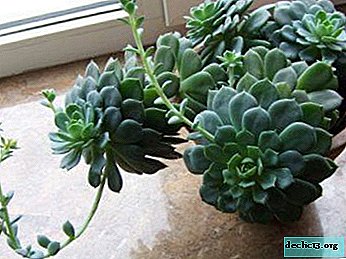
If the echeveria is no longer young, then you can get by replacing the topsoil in the pot, while being careful to not damage the velvety layer of leaves, which is very easy to do.
In no case should you transplant Echeveria in winter, because in the fall, it begins to dry out, thereby preparing for the upcoming wintering.
Stages of work at home
Nuances
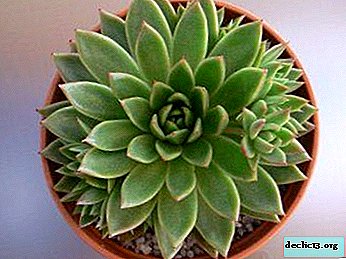
Echeveria has a superficial root system, so wide, shallow pots are suitable for it.. Before you pour earth into it, you need to thoroughly rinse it with hot water.
The soil must necessarily be sufficiently loose, therefore, ready-made substrate for cacti will not be suitable for transplantation, because Despite its composition, for echeveria it may still be insufficiently drained. Also in such soil there is a lot of peat for this plant, which can cause rapid decay of its roots.
Tip: Or you can choose a special substrate for succulents, which include echeveria.It is recommended to add sand, perlite, vermiculite or crushed expanded clay to the substrate. These additives are a kind of soil disintegrant. And the most optimal soil composition for echeveria is as follows:
- Garden land - 1 part.
- Any baking powder - 1 part.
- Ready substrate - 1 part.
As nutritional supplements are wood bark and charcoal.
Step-by-step instructions for Echeveria transplant after purchase:
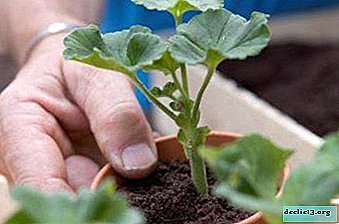
 Choose a pot of the right size for the plant.
- Rinse the pot thoroughly with boiling water.
- Lay good drainage on the bottom of the pot.
- Gently pull the plant out of the previous container. It is very simple to do this: it is easy enough to knock on the walls of the pot or to press on them.
- To decontaminate the soil, you need to calcine or steam it.
- Inspect its roots for damage. If they are found, get rid of the parts of the roots on which there are cracks or breaks with clean scissors or a knife.
- Carefully place the plant in a new pot.
- Lay the ground so that it completely hides the roots, but does not touch the leaves.
- Water the plant sparingly.
 Choose a pot of the right size for the plant.
During disposal of damaged parts of the roots, it is necessary to cut out not only the diseased area, but also to capture the healthy one - 2-3 cm. The slice must be treated with charcoal.
We recommend watching a video about the correct transplantation of echeveria into a larger pot:
After the purchase
Precisely because the substrates in which the flowers are grown in the store mainly have peat in their composition, after buying echeveria, it is necessary to transplant into loose soil for succulents, after adding all the components listed above.
Immediately after acquiring a plant, it is necessary to transplant it into a healthy and nutritious soil, otherwise it will begin to die in a dense storey substrate.
There are absolutely no differences in the usual transplant and eheveria transplant after purchase: the same soil, the same procedure. The only thing to remember: young plants are transplanted once a year, and adults (2-3 years) only as necessary, i.e. only the acquired plant is transplanted more often than what has been standing on the windowsill for many years.
In open ground
If you wish, you can transplant this plant into the street, in open ground, which is quite possible, because most species can withstand temperatures up to -5 degrees. Naturally, with the advent of winter, echeveria grown on the street must be dug up, and then placed in a cool room (from -5 to -10 degrees) and not watered.
Important: The lower the temperature at which the plant is located, the less water should be irrigated.If it is not possible to provide the required coolness, you can place the flower in a moderately lit place. To irrigate no more than 1-2 times a month and do it with a small amount of water.
Step-by-step instructions for transplanting echeveria into open ground:
- Prepare a well-lit, weed-free and moistened place for the plant.
- Carefully pull the echeveria out of the pot without damaging the velvety layer on the leaves.
- Place in a place reserved for her.
- Sprinkle with earth.
- Water sparingly.
The main feature of growing such a flower in open ground: if you provide it with a good place where there will be enough light and a moderate amount of moisture, then it will not require any care at all, except for removing weeds around it.
Plant care in a new pot
After transplanting, the flower requires usual care without difficult manipulations:
 Temperature and humidity. It tolerates the dry air characteristic of urban apartments, it also endures winter with central heating on window sills. But in order to avoid damage to the wax coating on the leaves, the plant can not be sprayed. He feels comfortable in the summer at 22 - 25 degrees, in the winter it is possible to provide 6 - 8 degrees, but can also grow at 18 - 20 degrees.
- Lighting. Unlike many indoor plants, it loves direct sunlight, which does not harm its leaves at all. It can be easily placed on the south windowsill or balcony, but then you need to protect it from rain.
- Watering. Echeveria is rather picky about this factor: with excess moisture, root decay begins, and this will be immediately visible. Therefore, it is necessary to provide good drainage. And with a lack of moisture, the leaves will “notify” their sluggish and shriveled appearance.
- Top dressing. Fertilizing is highly discouraged because it can damage the appearance of the plant. Top dressing is allowed only during the growing season. And in winter you cannot do this at all
 Temperature and humidity. It tolerates the dry air characteristic of urban apartments, it also endures winter with central heating on window sills. But in order to avoid damage to the wax coating on the leaves, the plant can not be sprayed. He feels comfortable in the summer at 22 - 25 degrees, in the winter it is possible to provide 6 - 8 degrees, but can also grow at 18 - 20 degrees.
About the rules for caring for echeveria at home, read here, and from this article you will learn how to get the echeveria arrow released and what to do next when it has faded.
What to do if it does not take root after the intervention?
If after a transplant, the plant begins to wither and wither, then the roots were most likely damaged when pulling it out of the old pot. In this case, you need to transplant again, carefully inspecting the roots for faults and cracks, which you must then get rid of. Slicing areas are treated with ash or charcoal chips.
If the soil that was prepared is not loose enough, then the plant suffers from a delay in excess moisture. Then you also need to transplant it, adding more baking powder to the substrate and taking care of the drainage.
Perhaps echeveria suffers from pests, which insecticides can easily get rid of. This can happen if the soil was not calcined or steamed before transplanting.
Conclusion
Echeveria is incredibly unpretentious and tenacious in almost any environment, therefore, both for a professional gardener and a beginner in this matter, it will not be difficult to grow such a plant both at home in a pot and outdoors in the open ground.
Watch the video: 5 COMMON MISTAKES IN CACTUS CARE (January 2025).


-
The ceiling in the children's room: design ideas
Creating a design for a children's room is as interesting as a responsible task. It is necessary not only to choose the right safe, reliable and durable materials for decoration, but also to take into account the fact that for a small owner of a room it is a whole world in which he grows, develops, learns new things, rejoices and is sad. ... -
-
-